Posts

Showing posts from October, 2018

Printing Processes

Image
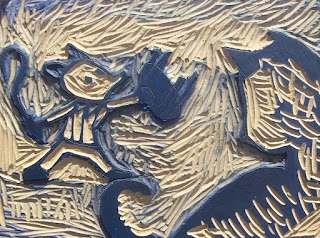
        Pressure + Ink: Relief Process- This is an older form of printing. The printer carves out whatever they want to print and then they transfer it to the paper. The printer starts by carving an image on a block of wood or metal. They then wet it and put ink onto it. They place a piece of paper or whatever they want to print it onto and they apply pressure onto the paper. Then they let it dry and brag to their friend how cool they are. Step 1: Carve the image you want to print onto your wood or metal block Step 2: Wet the block with a mixture of ink and water Step 3: Put ink on the block Step 4: Place the paper you want the image printing onto on the block Step 5: Apply pressure evenly across the paper Step 6: Slowly take the paper off of the block Step 7: Let the ink dry Step 8: Enjoy Intaglio Process- In this process you are scratching the metal itself to get your desired image in from the press. By scratching the metal you are moving it to make grooves in it for the i

E-comm Procedures Video

Image
       In E-Comm our groups choose a topic based on Procedures we felt were necessary for ONW students to know how to do. My group choose to use bullying as our focus for the video, even though we knew it would be hard to fit such a crucial topic into a 30 second video.        We started in the planning phase with our story boards, we planned which shots we would need and what order we would need them in. Next we decided roles. I was the victim of the bullying and Drew, John, and DJ we the main Bullies.        Next we started filming. We started with the shot of me opening the locker. We stacked up textbooks to make sure I was centered in the frame. We started recording and them I opened up the locker, which ended up being a problem we didn't notice until editing, because the camera didn't have time to adjust to all the new light that entered the frame. Next we shot the shot of me being thrown into the trash can, which I didn't use in my final video because I didn'

Photoshop Pop Art Project

Image
       For this Photoshop assignment we took photos with a partner and then edited the photos to look like pop art from the 50's. I choose a color filled pallet with brighter colors to make sure that it was authentic and reflected art from that time period. I began by making the background with the shapes. I originally had a spray paint looking background but it didn't look that good so I tried a few more designs. I eventually decided on the rectangular background with the multiple colors. I then took my subject and made her match with the background but stand out at the same time to make sure she was still the subject. I was inspired by the bright poppy colors and the cartoony look from pop art.        While creating this project I used a variety of photoshop tools. I used masks to cut her out of the background and then I put her onto a background that I created. I used the shape tool to create the background with rectangles. I also choose the stroke and made it thicker